Use these specific instructions when preparing digital files for print and production. By following these steps we can make you great looking custom drum heads, stage graphics and band merch.

Image Quality
Our print quality directly corresponds with the type of files you provide. We assume you have read this section and are supplying the best quality files you have for print. If you have questions about your digital files please make a note in the ordering instructions box in our shopping cart or contact us prior to printing.
File Types
.png .jpg .pdf files will load quickly into our online Designer Apps. tif. eps .svg files can be used but may experience longer upload times. If you are experiencing upload timeout errors, try resaving as .png .jpg .pdf and reload. Files over 100mb cannot be used with our online Designer Apps but you can upload them here.
– T-Shirts we prefer .png files to preserve transparency backgrounds. We accept .jpg but these files can create an anti-alias around the image causing a halo pixelation effect when printed.
Color Mode
RGB Color Mode files are preferred. Colors come out more vivid when using this setting with our specific printing processes. Some very bright colors and fluorescents are impossible to achieve. More about color mode.
Fonts
Convert all fonts to curves or paths to eliminate the need to send fonts.
Bleed
This is the printing area that goes beyond the edge of the product print area before trimming. Our Designer Apps only show the live print area. But you should still extend images 1″ beyond the live area, even though you cannot see it on your screen. Having this extra Bleed will help us when producing your products. If you forgot to add Bleed or cannot add it due to image issues and or limitations, our production team will do it for you. We are experts at photoshopping extra image.
Designing with Transparent Background Images
By making the background of your logo transparent, you can then place it on top of any image or color background without a bounding box showing. More Info. Our online Designer Apps support transparent images saved as .png .eps .pdf. The base color of most of our product line is White. The only clear materials we can put graphics onto are Clear drumheads for kick drums.
Contour Cut Graphics – MetallicHeads, Stickers
We cannot print directly to some products but we can adhere Contour Cut Graphics. Contour Cutting is the process of cutting a contour around the perimeter of a printed graphic or a single color transfer film into a specific shape. We then place the cut-out graphic on top of Chrome & Sparkle Drumheads, Clear Drumheads, FiberSkyn Drumhead and we can also make Stickers into custom shapes. More about contour cutting.
Image Size and Resolution
Your design will look great as long as the resolution meets or exceeds our recommendations. If you plan to build a variety of custom products, create your graphics for the largest size product you want to order. Your files can then be scaled down for each of the smaller sizes without losing quality. Keep in mind that scaling files up in size may cause issues with print quality.
VividHeads – Custom Bass Drum Heads
100ppi – 300ppi when scaled to 100% at actual print size
MarchingHeads – Custom Marching Drum Heads
100ppi – 300ppi when scaled to 100% at actual print size
Drum Head Decals – Removable & Permanent Skins
100ppi – 300ppi when scaled to 100% at actual print size
Band Stickers – Vinyl Printed Stickers
300ppi – 400ppi when scaled to 100% at actual print size
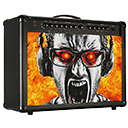
Speaker Grill Cloth – Custom Amp Grill Clot
150ppi – 300ppi when scaled to 100% at actual print size
Band T-Shirts – Custom Concert Tees
150ppi – 300ppi when scaled to 100% at actual print size.
Banners, Backdrops, Stage Scrims and Retractable Banners
Resolution is based on the Viewing Distance of your Banner:
- 1’ to 3’ = 200ppi – 300ppi when scaled to 100% at actual print size
- 3’ to 10’ = 100ppi – 150ppi when scaled to 100% at actual print size
- 10’ to 20’ = 50ppi – 100ppi when scaled to 100% at actual print size
- 25’ or more = 35ppi – 75ppi when scaled to 100% at actual print size
Banners – Pixel Resolution Chart
Retractable Banners – Pixel Resolution Chart
Stage Scrims – Pixel Resolution Chart
Backdrops – Pixel Resolution Chart
Banners are intended to be viewed from further distances. The closer your viewer is to the image surface, the smaller the dots need to be and the higher the quality. The farther away they are, the larger the dots need to be and the lower the quality. Relative to your eye the dot is the same size. You can read more about this here.
To prevent any important text or images from falling onto the hemline or interrupted by a grommet, keep important images and text 1.5” from the edge.
If the size of your banner exceeds 216″ or 18′ you will need to scale you artboard area down. We suggest 1/10th scale. Keep in mind when you scale your artboard down your image resolution will need to increase times 10. For example, to achieve 100ppi at actual size you will need a 1000ppi image.
Mathematic Equation 100ppi x 10% scale = 1000ppi
![]()


